Subteam Settings
Subteams represent specific working groups within your Project Team. This page covers how to create and manage these subteams.
Just like the Main Team, each subteam has its own Shared Resource ID generated when it is created.
Editing the Subteam Name does NOT change the Shared Resource ID.
If your subteam is integrated with external services, renaming it will not update those resources:
- Slack Channels: The names of existing Slack channels associated with the subteam will not change.
This ensures that communication links and integrations remain stable even if the subteam's display name is updated.
The Default Subteams
For a full breakdown of default subteams and permissions for all team types, see Team Creation.
You can add more subteams as needed to organize your project (e.g., "Design," "Marketing," or "Mobile").
Creating a Subteam
To add a new subteam to your Project Team:
- Navigate to Organization > Teams.
- Select your Project Team.
- In the Subteams section, click the "+" (Plus) button.
- Enter a Subteam Name and Description.
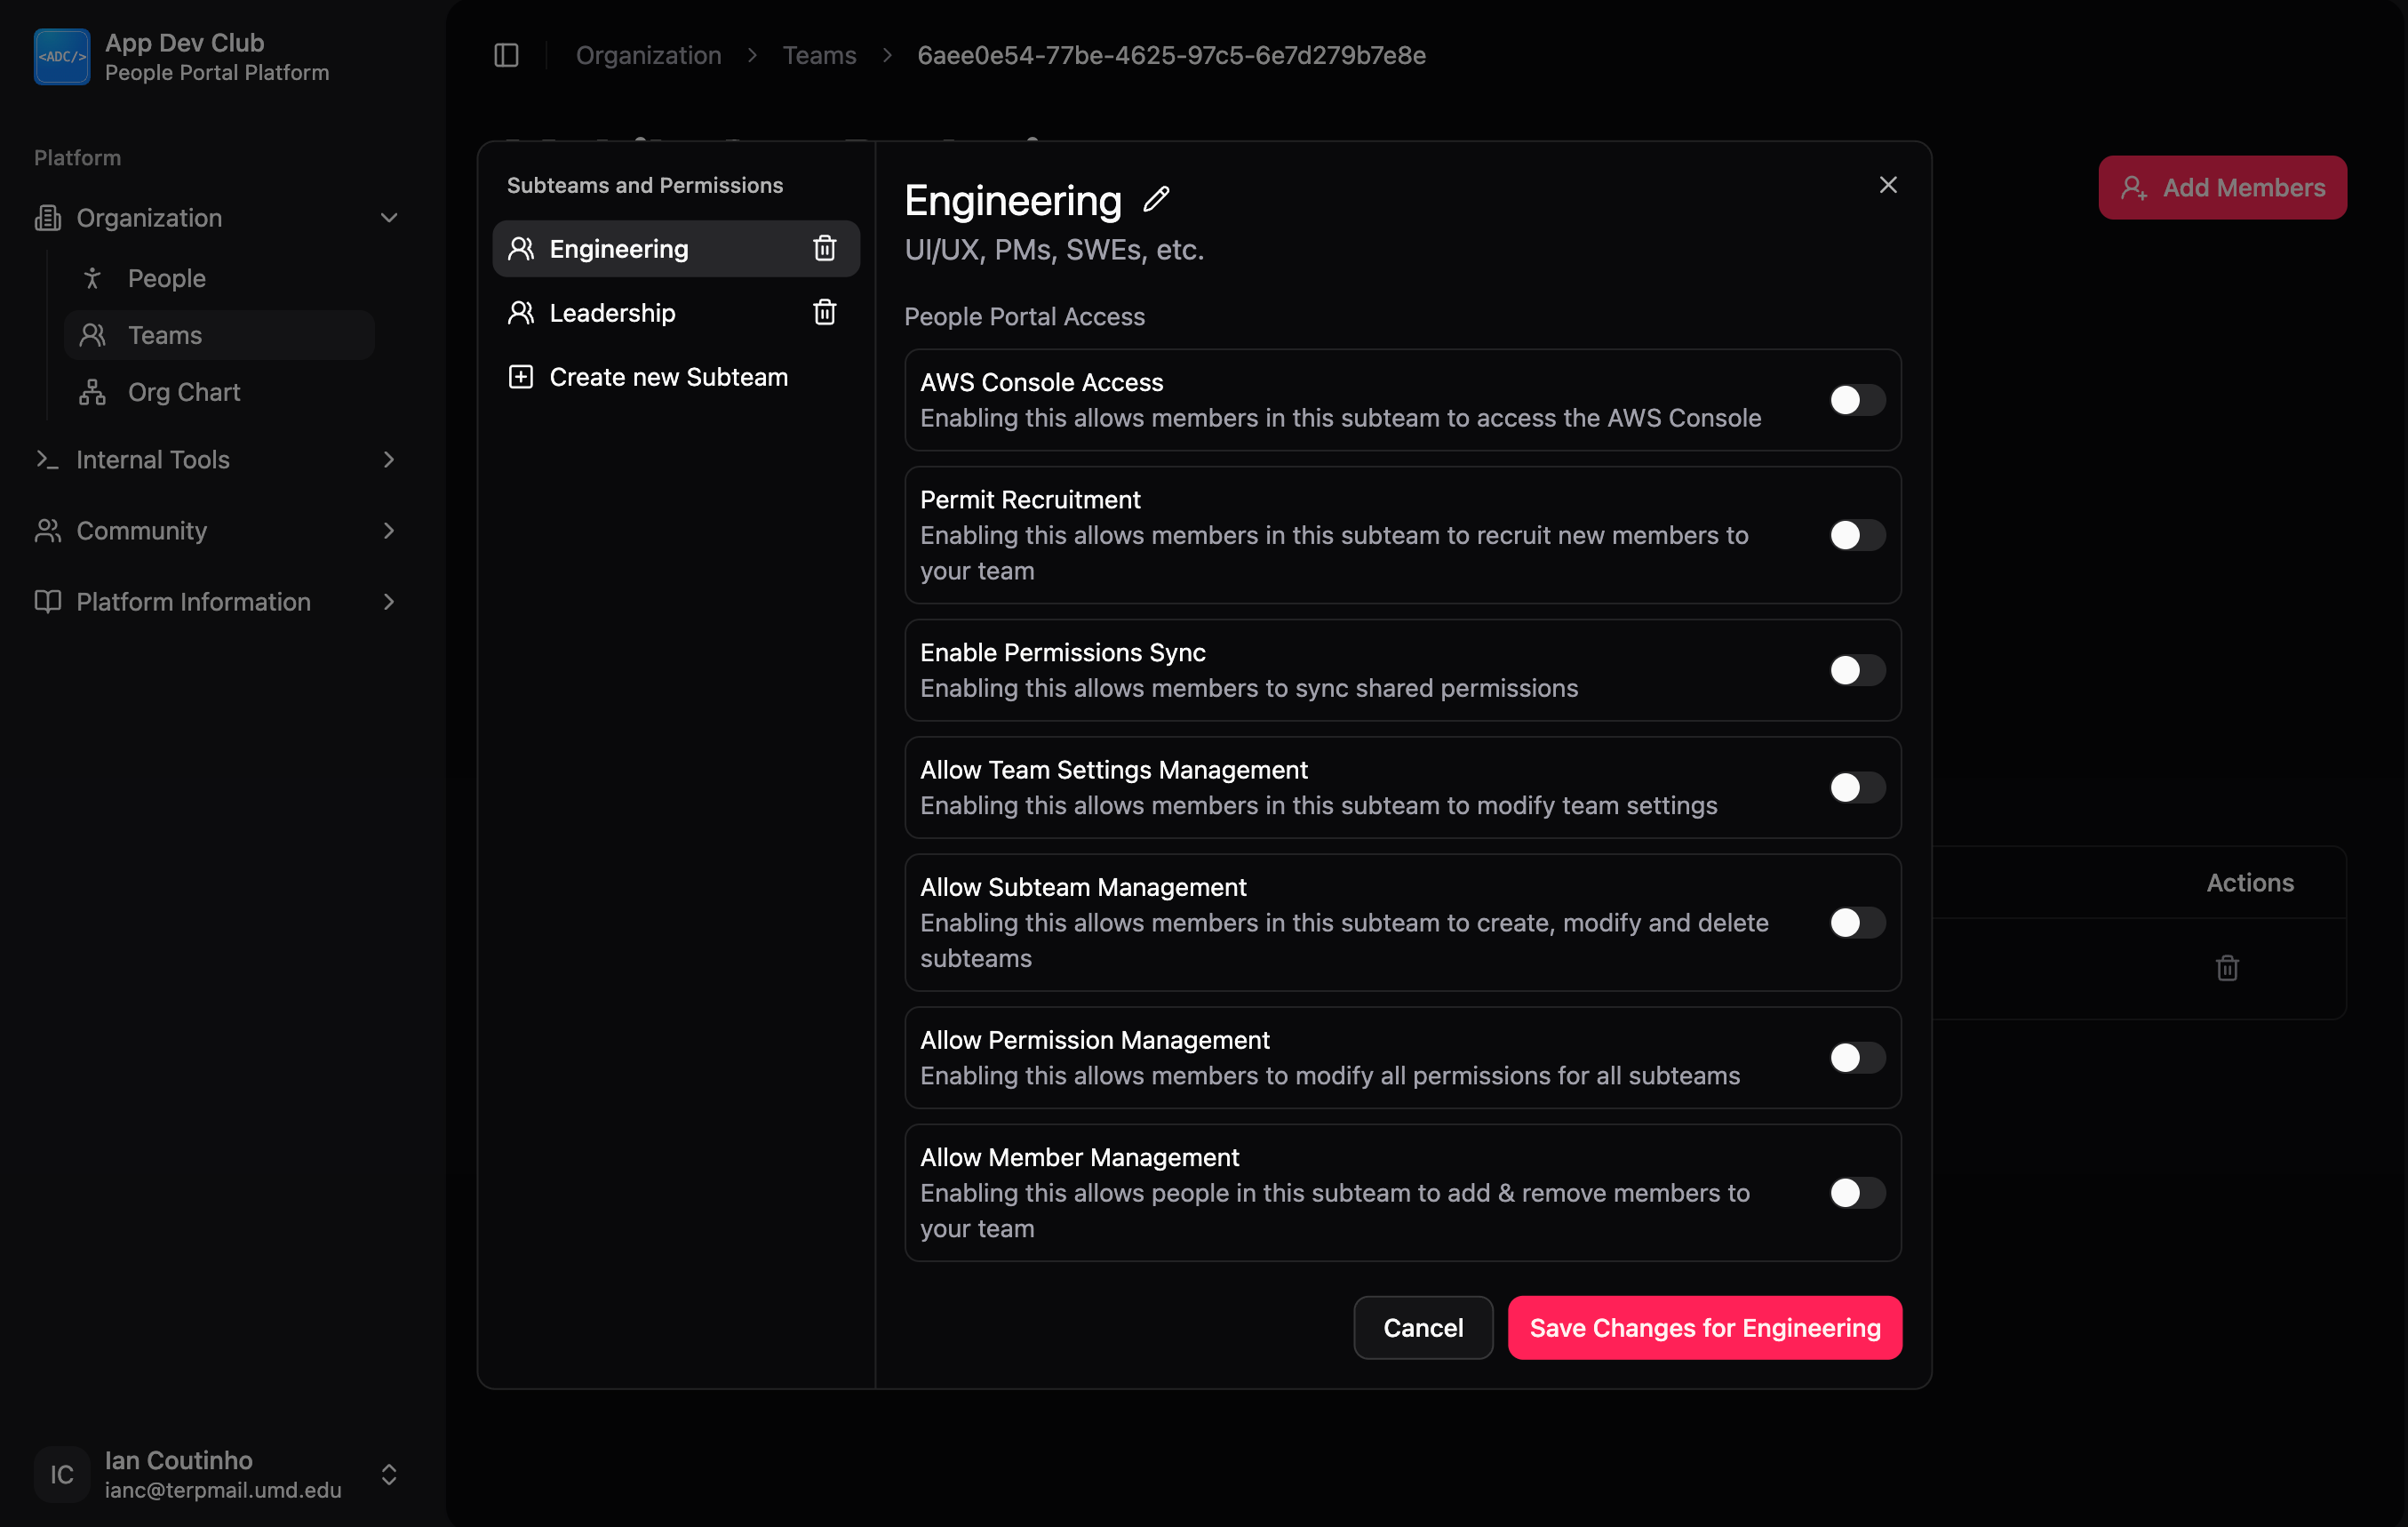
Editing a Subteam
To change the details of an existing subteam:
- Click on the Manage Subteams button on the Team Dashboard.
- Click on the specific subteam on the left that you want to edit.
- Click on the pencil icon next to the subteam name at the top.
- Update the name or description as needed.